For a few last years, my company was building mostly web applications. The demand for desktop applications was very low, and even though we had some use cases in which building a desktop app would be less costly, our customers preferred the web solutions. The uncertain future of WPF, together with low interest in UWP, indicated that the web is practically the only way to go.
The situation changed a bit when Microsoft announced that .NET Core 3.0 would support WPF and WinForms. At about the same time, we got a customer who wanted us to build a large custom point-of-sale solution, and from all the choices we had, WPF sounded like the most viable option. There were many desktop-specific requirements in the project, for example printing different kinds of documents (invoices, sales receipts) using different printers, an integration with credit card terminals, and more.
Deployment of desktop apps
Together with WPF and WinForms on .NET Core, Microsoft also started pushing a new technology of deployment desktop apps: MSIX.
It is conceptually similar to ClickOnce (simple one-click installation process, automatic updates, and more), but it is very flexible. The most severe pain we had with ClickOnce was when we used it for large and complicated apps. We were hitting many issues and obstacles during the installation and upgrade process of the apps. The users were forced to uninstall the app and re-install it again. Sometimes, they had to delete some folder on the disk or clean something in the registry to make ClickOnce install the app.
MSIX should be more reliable as it was designed with respect to a wide range of Windows applications. It is a universal application packaging format that can be used for classic Win32 apps as well as for .NET and the new UWP applications.
It is also secure as the app installed from a package runs in a container - it cannot change system configuration, and all writes in the system folders or registry are virtualized. When you uninstall the app, no garbage should remain in your system.
You can choose to distribute the app packages manually, or you can use Windows Store for that. The nice thing is that you can avoid Windows Store entirely and use any way you want to distribute the MSIX. The most natural way is to publish the package on a network share or on some internal web server so they can be accessed using HTTPS.
Every step in the package building process can be automated using command-line tools, which allows us to embrace DevOps practices we got used to from the web world.
Our WPF project started when .NET Core 3.0 was in an early preview, but we have decided to try both WPF on .NET Core and the new MSIX deployment model.
The Simplest Scenario: Building a package to the WPF app
In my sample project, I have a simple WPF app that uses .NET Core 3.0.
The first step is to add a Windows Application Packaging Project in the solution:
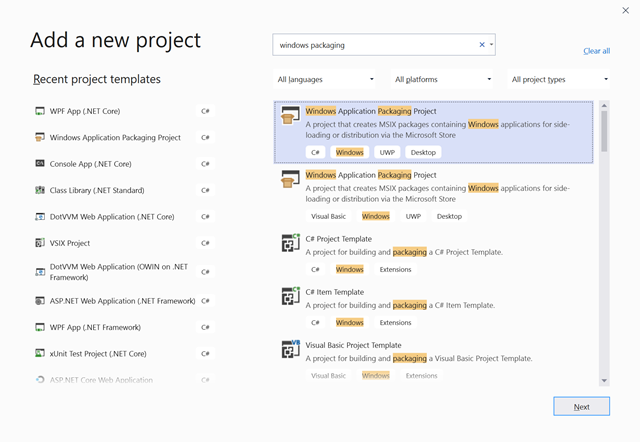
The Windows Package project contains a manifest file. It is an XML file, but when you open it in Visual Studio, there is an editor for it.
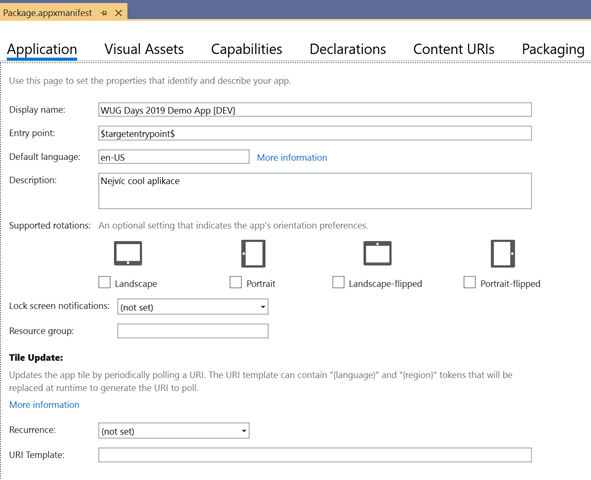
The most important fields are Display Name on the first tab, and Package Name and Version on the Packaging tab.
There are also several image files with the app icon, Windows Store icon, splash screen image, and so on.
Don't forget to make sure the WPF app is referenced in the Applications folder of the Windows Package project.

Now, when you set the WPF project as a startup project and run it, the application will run in a classic, non-package mode. It's the same as it always worked in Windows. The app can do anything that your user has permissions.
However, when you set the Package project as a startup project and run it, the application will run from the package.
There is a NuGet package called Microsoft.Windows.SDK.Contracts that contains the Package class - you can use Package.Current to access the information about the application package - the name, version, identity, and so on. There is even an API to check or download the updates of the package.
public static PackageInfo GetPackageInfo()
{
    try
    {
        return new PackageInfo()
        {
            IsPackaged = true,
            Version = Package.Current.Id.Version.Major + "." + Package.Current.Id.Version.Minor + "." + Package.Current.Id.Version.Build + "." + Package.Current.Id.Version.Revision,
            Name = Package.Current.DisplayName,
            AppInstallerUri = Package.Current.GetAppInstallerInfo()?.Uri.ToString()
        };
    }
    catch (InvalidOperationException)
    {
        // the app is not running from the package, return and empty info
        return new PackageInfo();
    }
}
When you right-click the Package project and choose Publish > Create App Packages, there is a wizard that helps you with building the MSIX package.
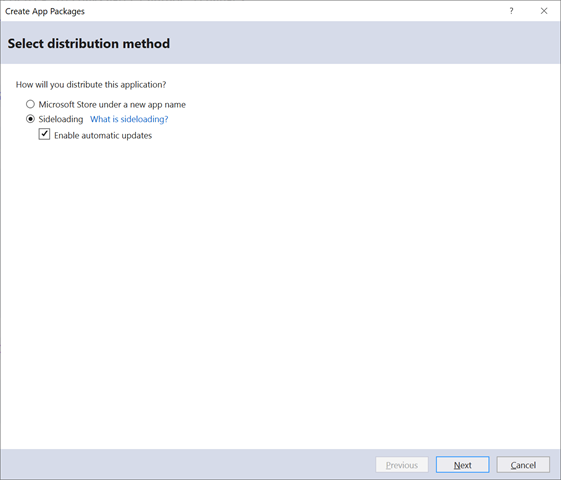
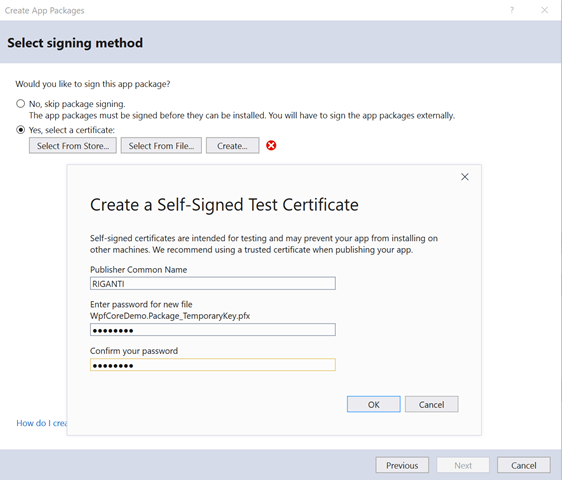
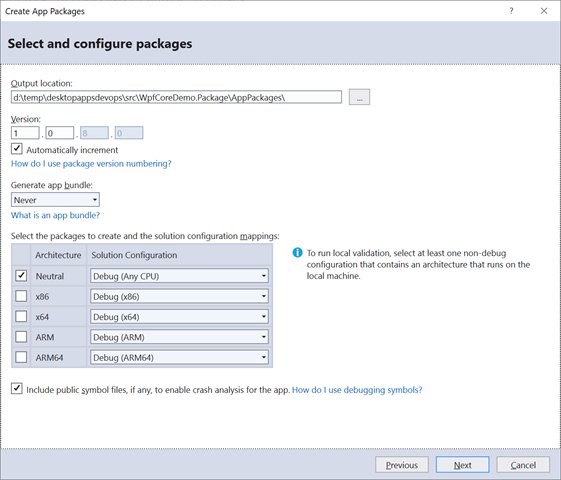
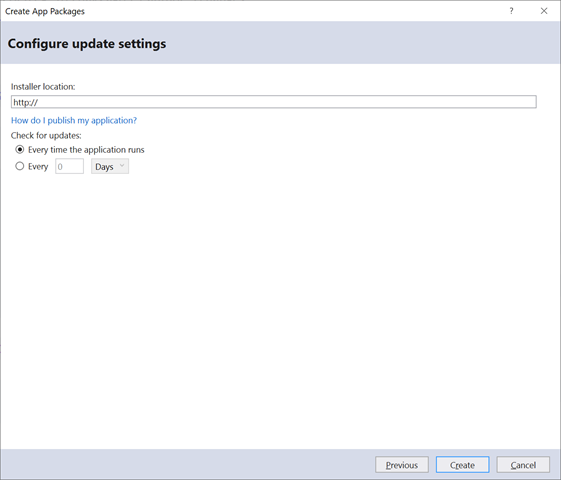
Update the installer location to either a UNC path, or to a web URL.
The process also creates a simple web page with information about the app and a button to install it. Aside from the MSIX package, there is also an App Installer file holding information about the app, its latest version, and a path to its MSIX package.
You can copy these files on a network share, or publish them at the URL you specified in the wizard.
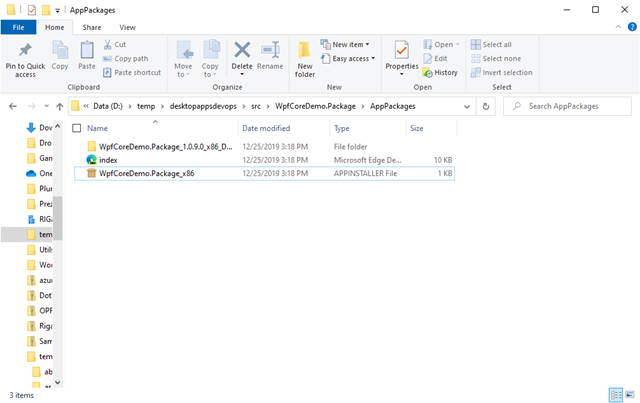
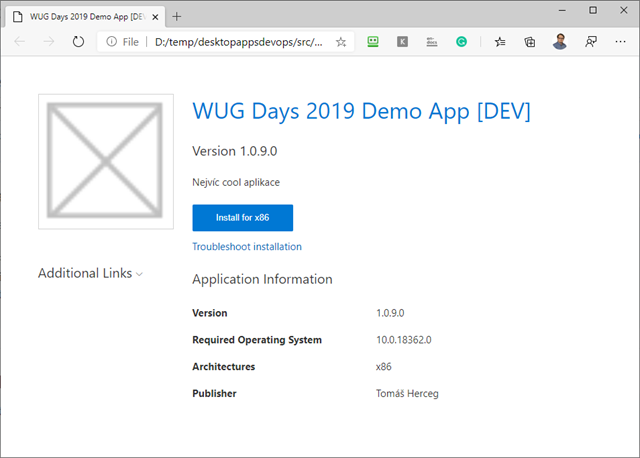
When you change something in the project, you can publish the package again and upload the files on a web server or to the UNC share.
The application will check for the updates when it is started, and when you launch it next time, the update will install automatically.
Summary
I've just got through the most straightforward scenario for MSIX. In larger projects, you will need to have multiple release channels (preview and stable), you will need to sign your packages with a trusted certificate, and you will want to build the packages automatically in the DevOps pipeline.
I'll focus on all these topics in the next parts of this series. Stay tuned.